
티스토리 뷰
cypress 설치 및 예제 주입
각 패키지 매니저에 맞춰서 설치한다.
pnpm으로 프로젝트를 진행하므로
pnpm add cypress -D 터미널로 설치한다.
설치를 하고 npx cypress open 을 터미널에서 치게 되면
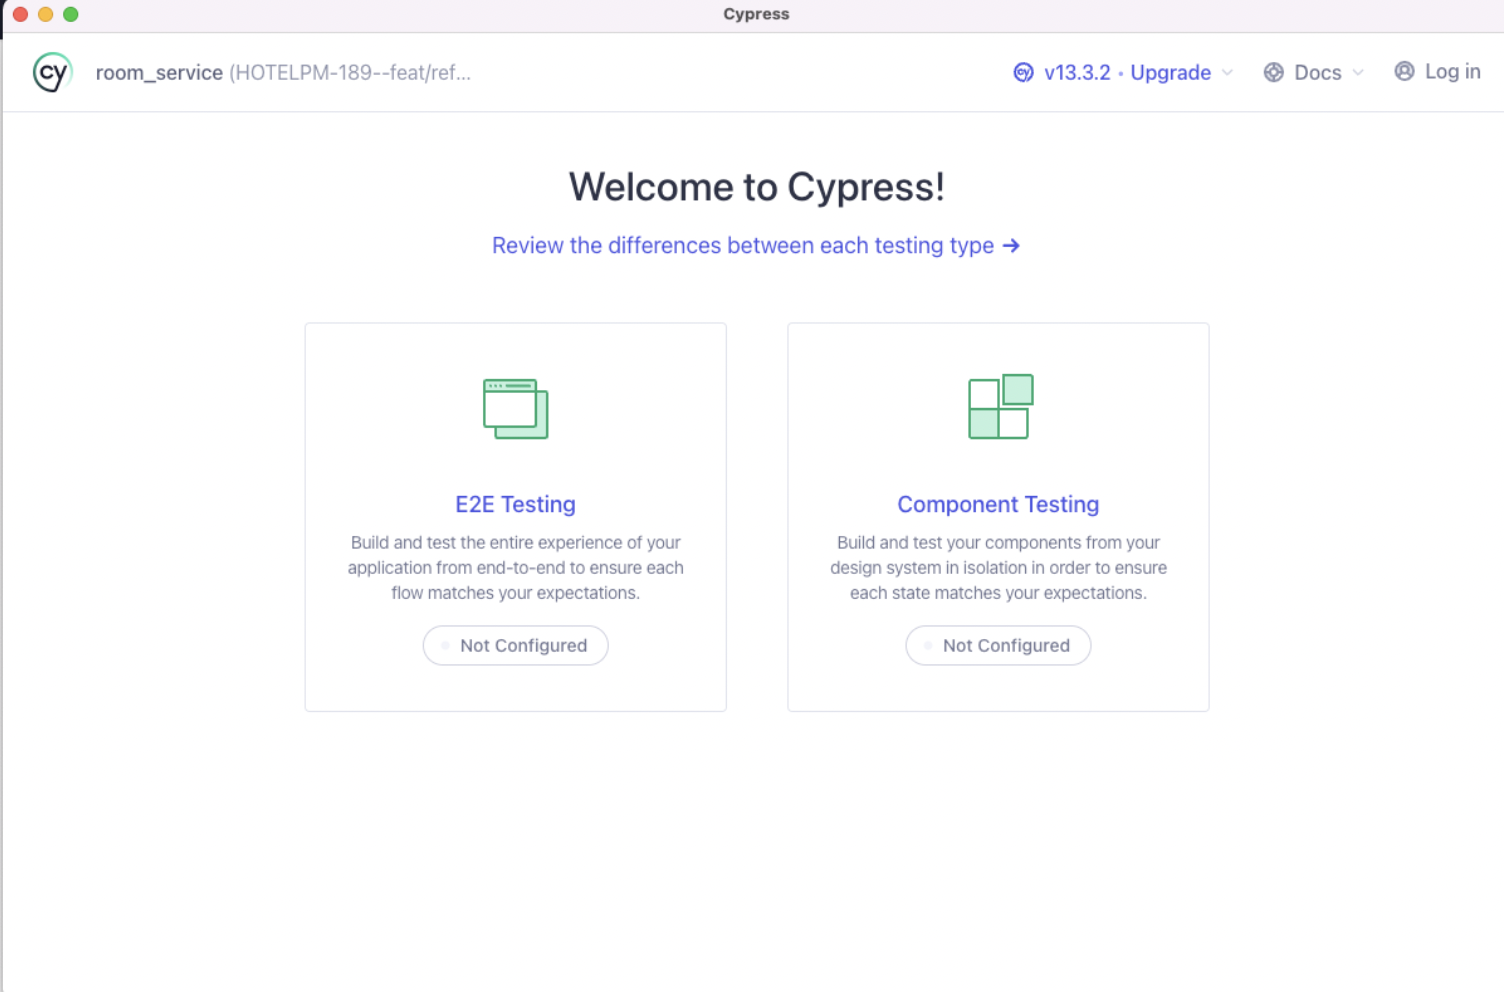
위와 같은 가상 브라우저가 뜨고
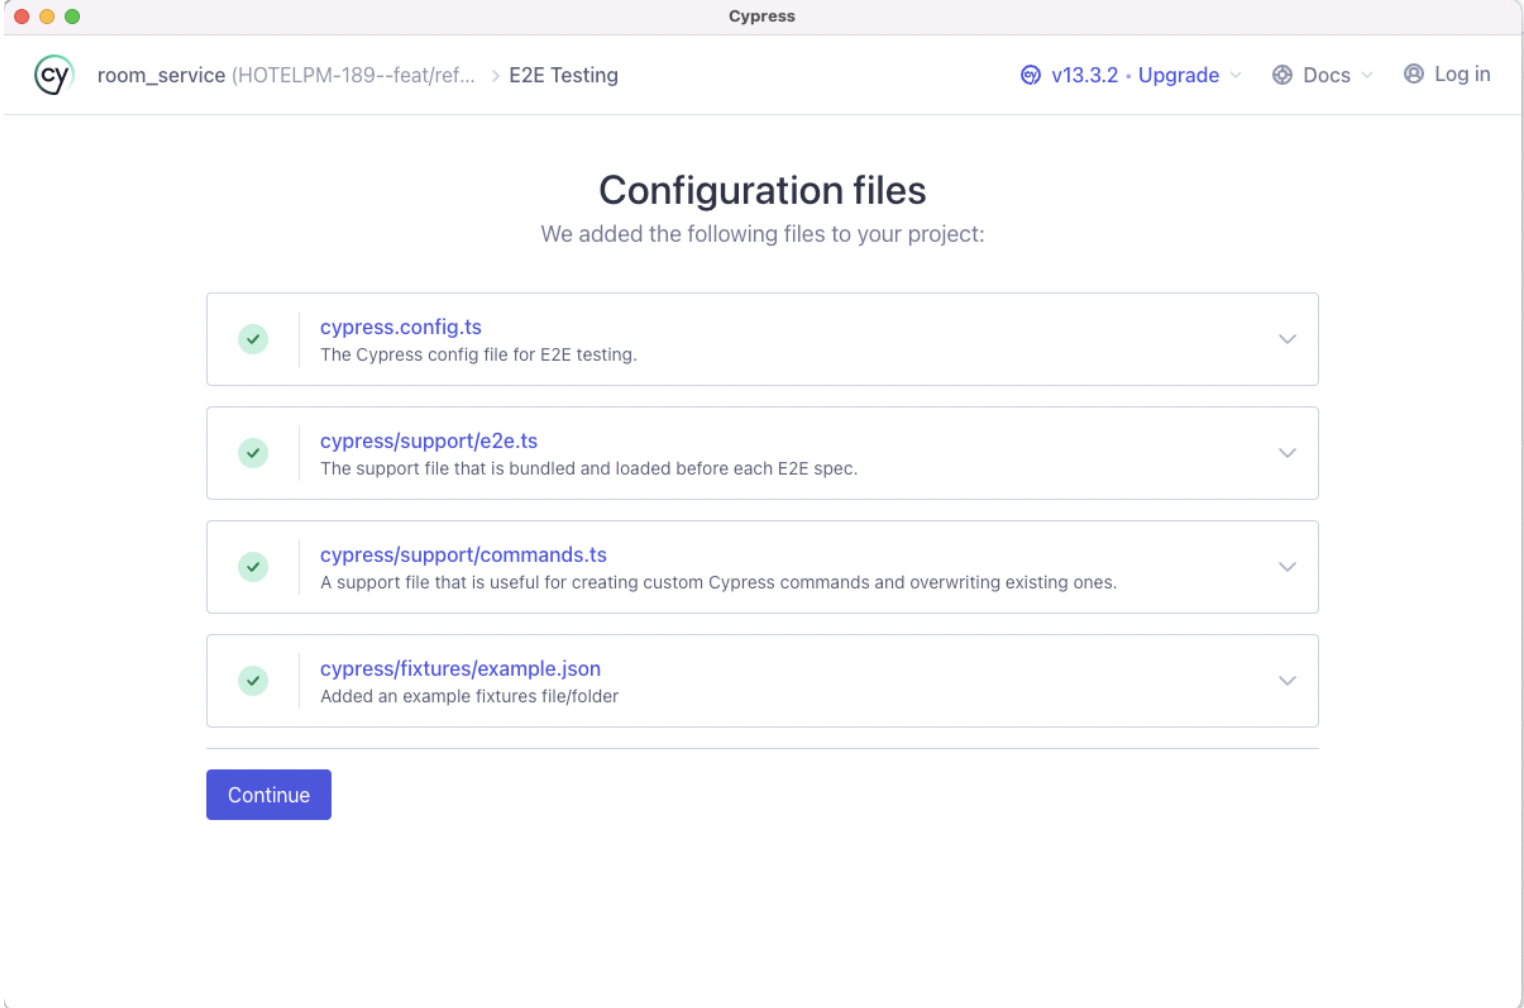
진행하면
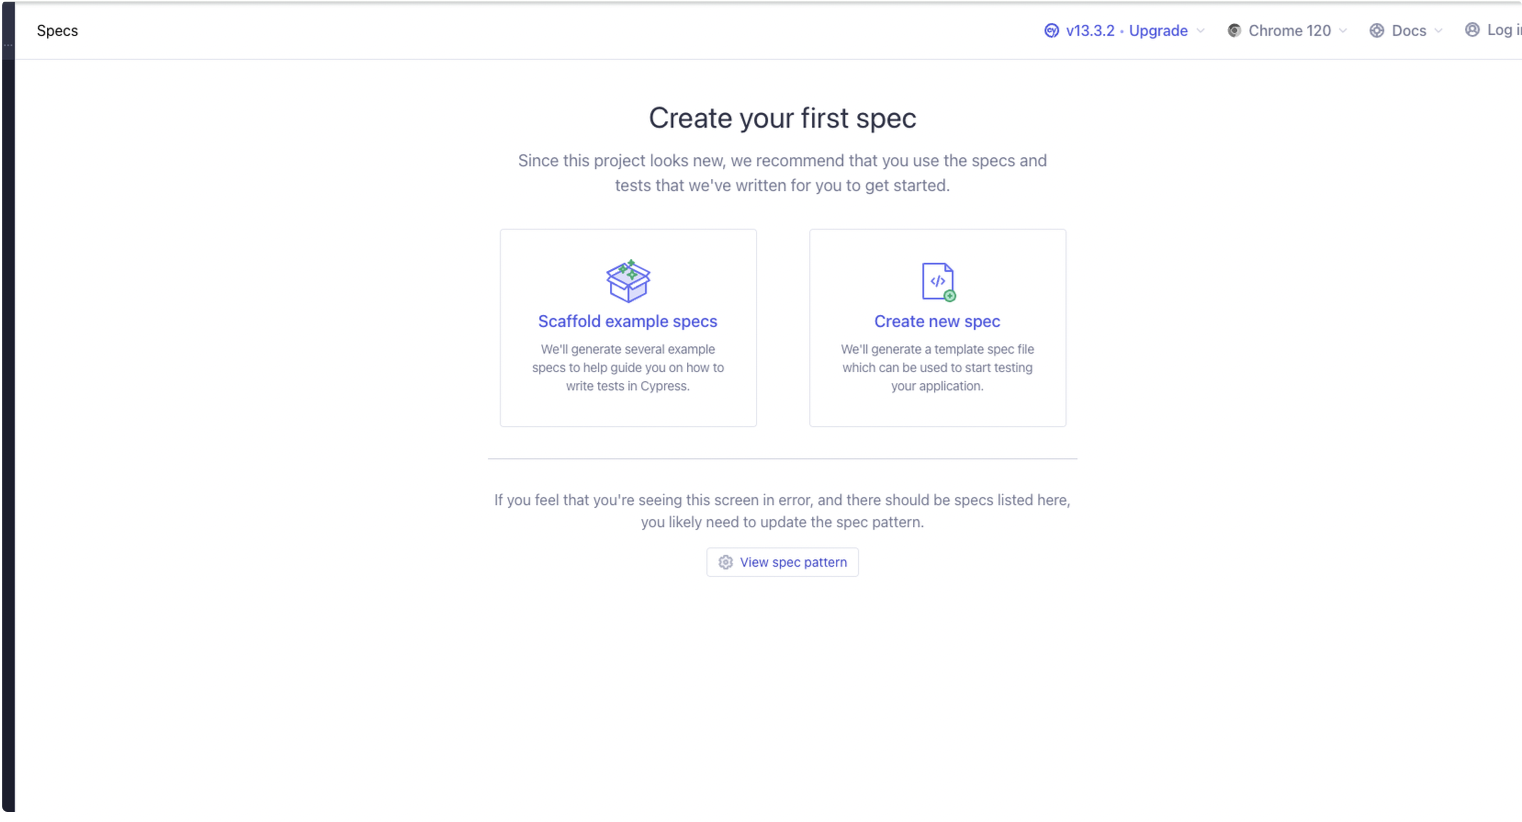
위와 같이 스펙 선택 창이 나오는데 이는 아무 스펙도 작성하지 않아서이다.
좌측 예제를 누르고 진행하면
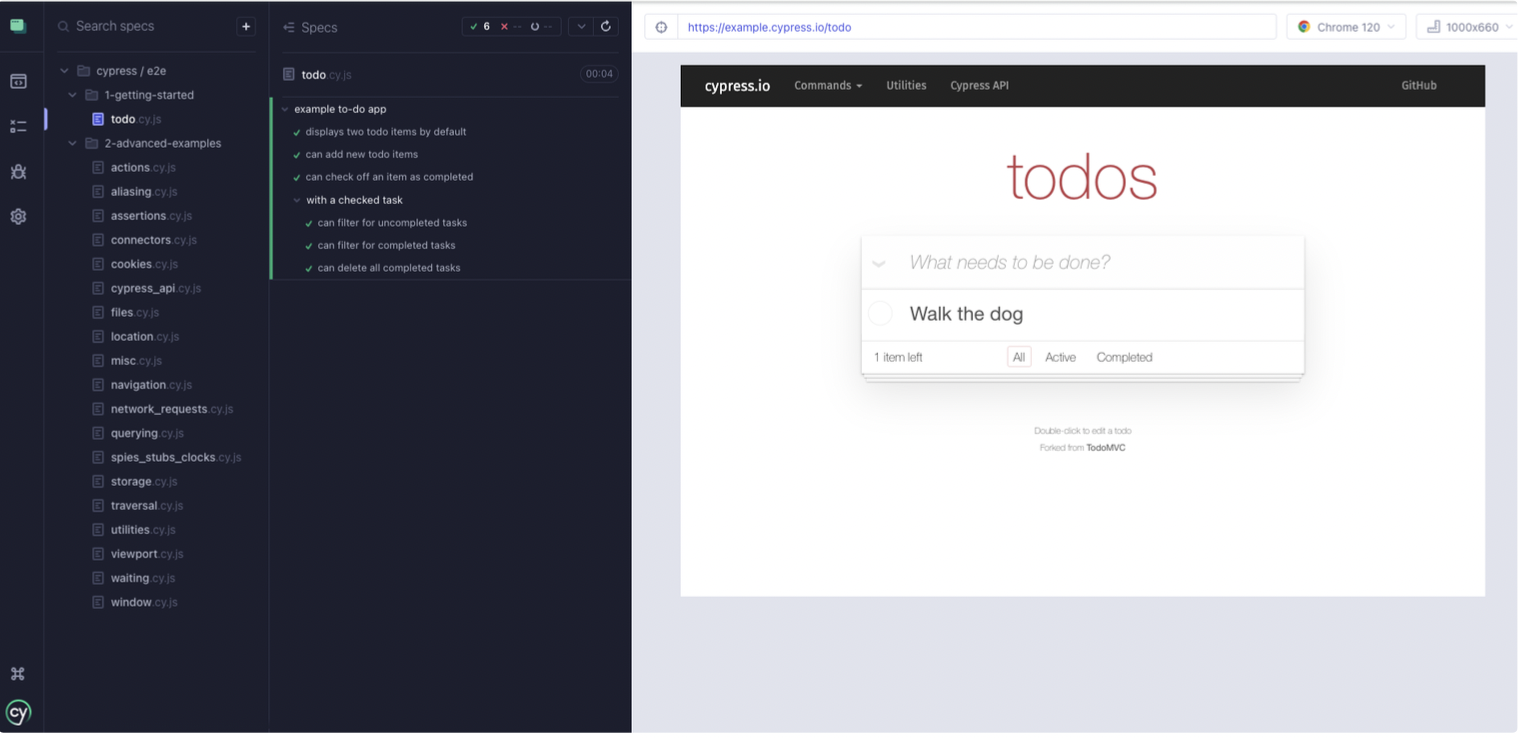
위와 같이 테스트를 할 수 있게 되고 눌러서 테스트를 실행시켜 볼 수 있다.
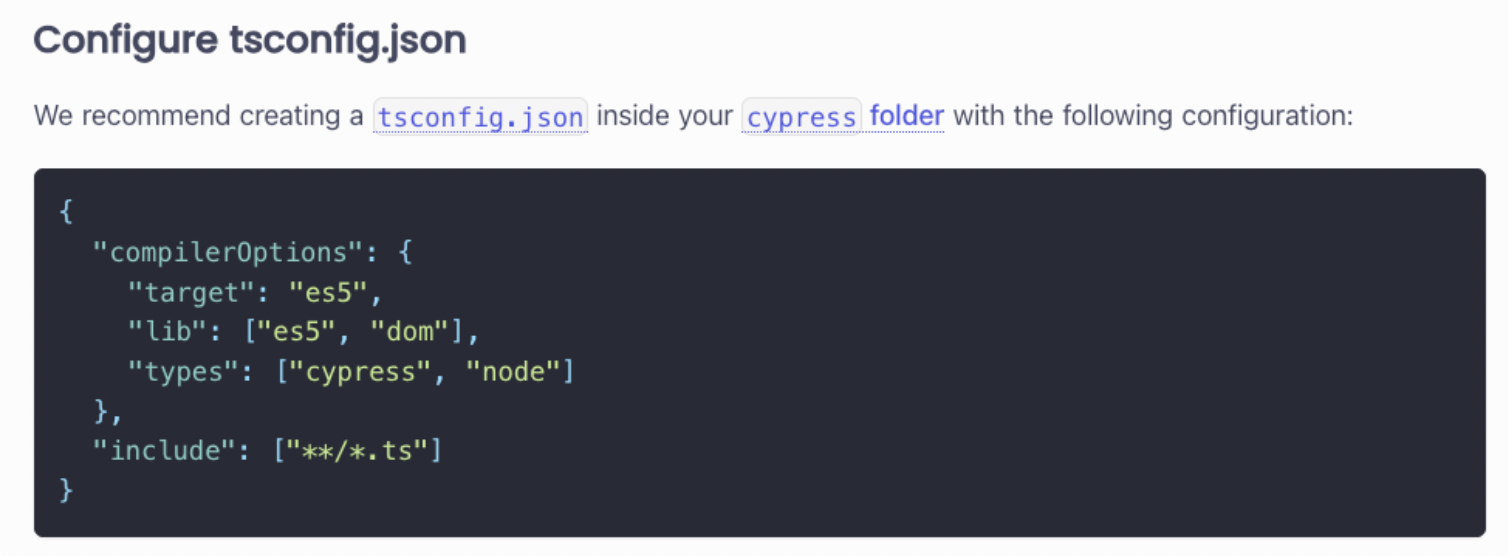
cypress 문법의 ts 컴파일을 위해 위 내용을 생성된 cypress 폴더 하위에 넣어주면
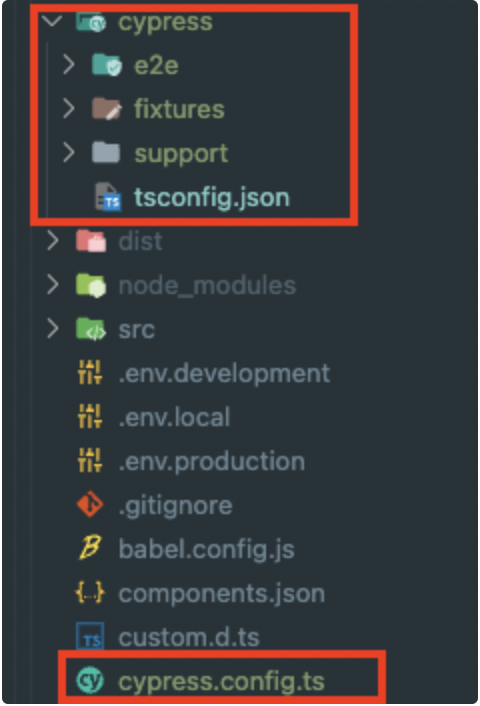
위 이미지와 같이 파일이 새로운 폴더와 파일이 생긴다.
cypress config 세팅
import { defineConfig } from 'cypress';

export default defineConfig({
  e2e: {
    setupNodeEvents(on, config) {
      // implement node event listeners here

      const version = config.env.VERSION || 'dev';

      const urls = {
        dev: 'http://localhost:3100',
        staging: 'https://staging.example.com',
        prod: 'https://example.com',
      };

      // choosing version from urls object
      config.baseUrl = urls[version];

      return config;
    },
  },
});
위 설정을 하게 되면 명령에 따라 cypress baseUrl이 바뀜, 즉 프로젝트에 설정한 포트, 베포 도메인을 자유롭게 설정하여 사용 가능함
명령어 별 기본 주소값
npx cypress open --env version="dev"
http://localhost:3100
npx cypress open --env version="staging"
http://staging.example.com
npx cypress open --env version="prod"
http://example.com
npx cypress open
http://localhost:3100
npx가 아닌 package.json에 스크립트 명령을 넣어서 실행가능
  "scripts": {
    ...
    // 브라우저를 크롬을 사용하고 headless 브라우저(기본값)로 테스트 실행
    "cy": "cypress run --browser chrome",
    // cypress 콘솔 브라우저 띄워서 테스트 실행
    "cy:open": "cypress open"
  },
cypress 코드 작성
describe('로그인 통합 테스트', () => {
  beforeEach(() => {
    cy.visit('/');
  });

  const value = {
    id: 'id',
    errorId: 'err-id',
    password: 'password',
  };

  const idInputSelector = 'input[name="loginId"]';
  const passwordInputSelector = 'input[name="password"]';

  it('아이디 입력란이 존재한다.', () => {
    cy.get(idInputSelector).should('exist');
  });

  it('비밀번호 입력란이 존재한다.', () => {
    cy.get(passwordInputSelector).should('exist');
  });

  it('아이디 입력 후 입력란에 아이디가 입력된다.', () => {
    cy.get(idInputSelector).type(value.id).should('have.value', value.id);
  });

  it('비밀번호 입력 후 입력란에 비밀번호가 입력된다.', () => {
    cy.get(passwordInputSelector).type(value.password).should('have.value', value.password);
  });

  it('로그인 데이터 입력 후 제출했을때 서버 응답이 정상적이라면 권한확인페이지로 간다.', () => {
    cy.get(idInputSelector).type(value.id);
    cy.get(passwordInputSelector).type(value.password);

    cy.get('button').contains('로그인').click();

    cy.location('pathname').should('eq', '/private-redirect');

    cy.location('pathname').should('eq', '/torder-home');
  });

  it('로그인 데이터 입력 후 제출했을때 서버 응답이 오류라면 페이지가 이동되지 않는다.', () => {
    cy.get(idInputSelector).type(value.errorId);
    cy.get(passwordInputSelector).type(value.password);

    cy.get('button').contains('로그인').click();

    cy.location('pathname').should('not.eq', '/private-redirect');
  });
});
위처럼 간단하게 작성 가능 하며 모든 테스트 대한 기본 wait값이 4000ms이기에
굳이 cy.intercept 로 api 콜을 spy하지 않아도 괜찮다.
단 응답까지 4초 이상 걸리는 api 요청이라면 기본 wait 시간을 config에서 늘려주거나 intercept로 추적한 뒤 해당 요청이 끝날때까지 기다리면 된다.
만약에 intercept로 실제 네트워크 요청이 가지 않게 해서 테스트에서 발생하는 서버 요청 비용을 줄이거나 프론트에서 컨트롤 가능하게 다양한 Mock Result를 받고 싶다면 사용하는게 좋다.
it('로그인 데이터 입력 후 제출했을때 서버 응답이 오류라면 페이지가 이동되지 않는다.', () => {
    cy.get(idInputSelector).type(value.errorId);
    cy.get(passwordInputSelector).type(value.password);

    cy.intercept('/login',{resultCode:200, resultData: true})

    cy.get('button').contains('로그인').click();

    cy.location('pathname').should('not.eq', '/private-redirect');
  });
위처럼 작성하면 url과 매칭되는 api call을 가로채고 두번째 인자로 넣은 response를 받환해준다.
만약 요청이 오래걸리면 해당 요청이 끝날때까지 기다리게 할 수 있다.
cy.intercept('/login',{resultCode:200, resultData: true}).as('login');

cy.wait('@login');
위처럼 해당 요청에 별명을 주고 wait 메서드로 기다리게 할 수 있다.
위 형식을 일반적으로 표현하면
API intercept
cy.intercept('POST', requestPath).as('apiCall');
cy.wait('@apiCall').then(()=>{
  // 성공시 실행할 테스트 로직
})
이번엔 기본 명령들의 요청시간을 늘리는 방법으로 해결하는 방식이다.
// cypress.config.ts
export default defineConfig({
  e2e: {
    setupNodeEvents(on, config) {
      // implement node event listeners here

      const version = config.env.VERSION || 'dev';

      const urls = {
        dev: 'http://localhost:3100',
        staging: 'https://staging.example.com',
        prod: 'https://example.com',
      };

      // choosing version from urls object
      config.baseUrl = urls[version];

      return config;
    },
  },
  // DOM 관련 모든 명령이 대기하는 시간 기본 4000ms
  defaultCommandTimeout: 10000
});
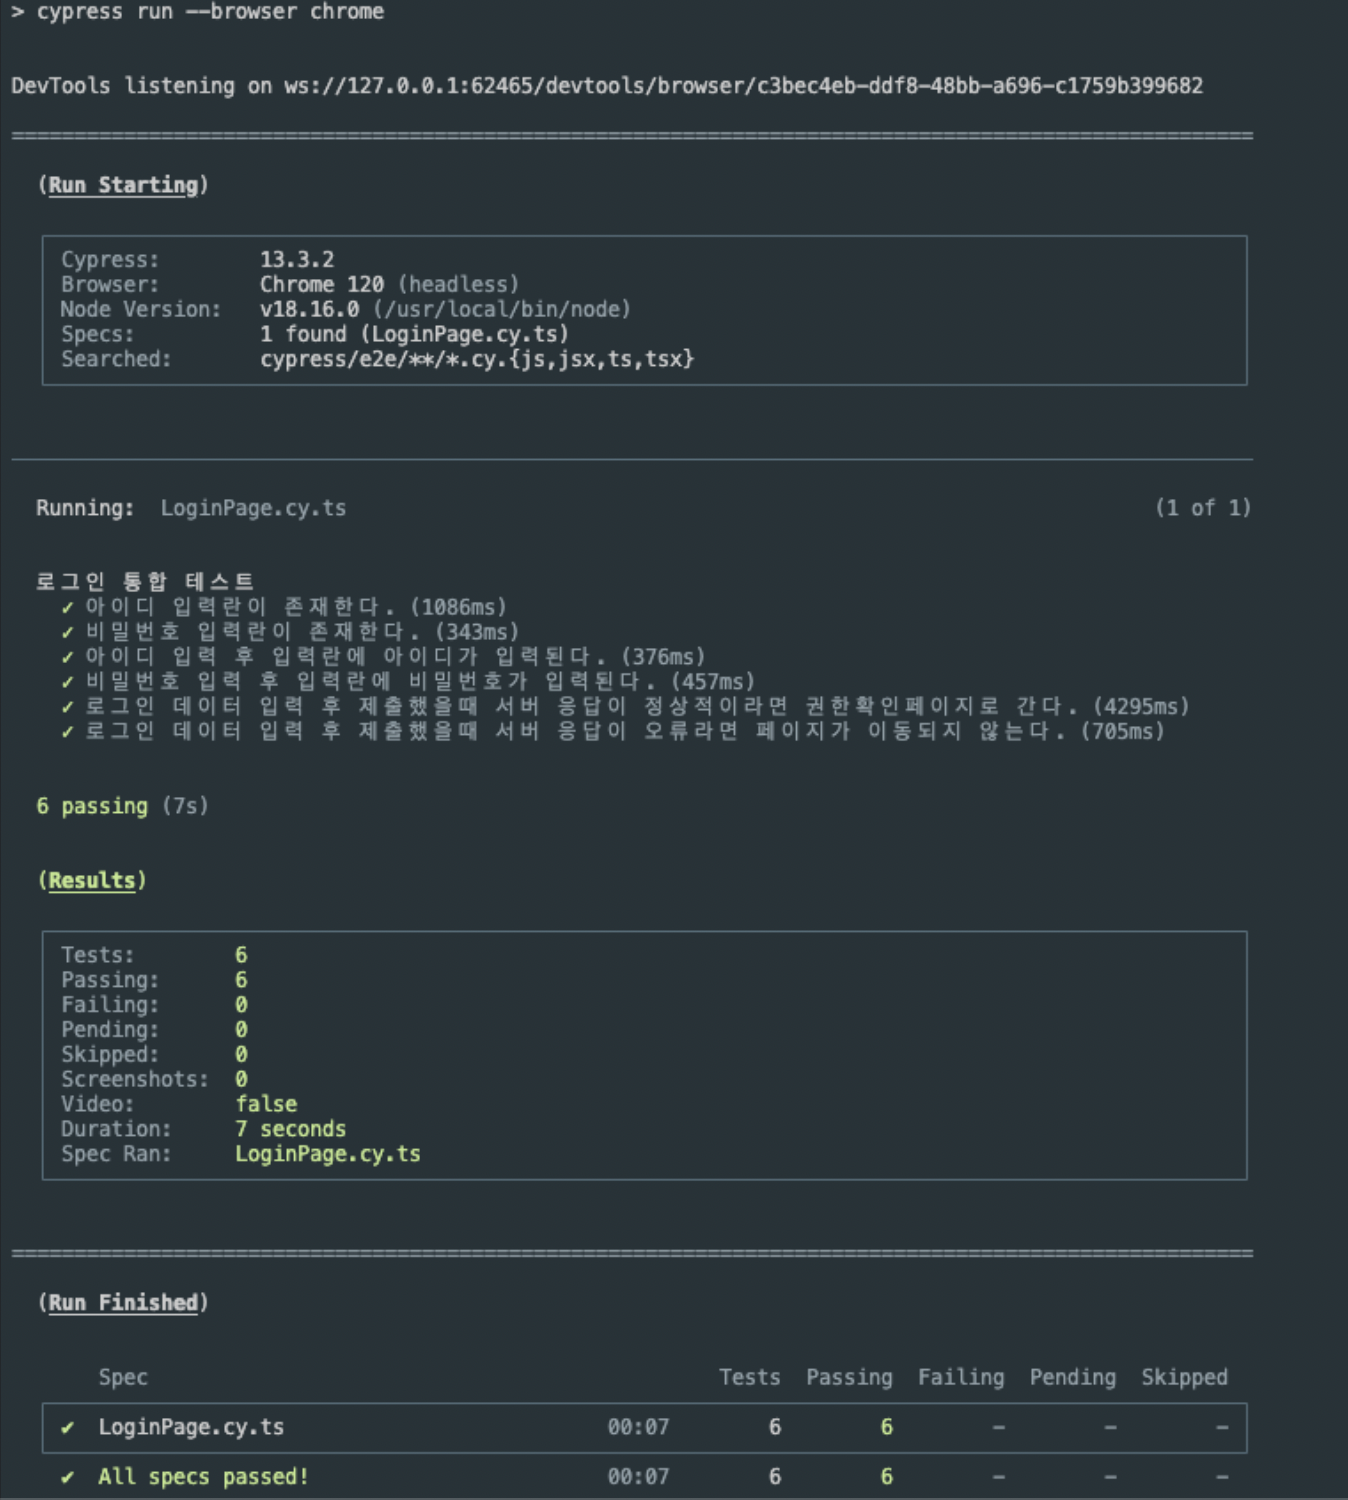
cypress 실행결과
cypress run --browser chrome 으로 실행시
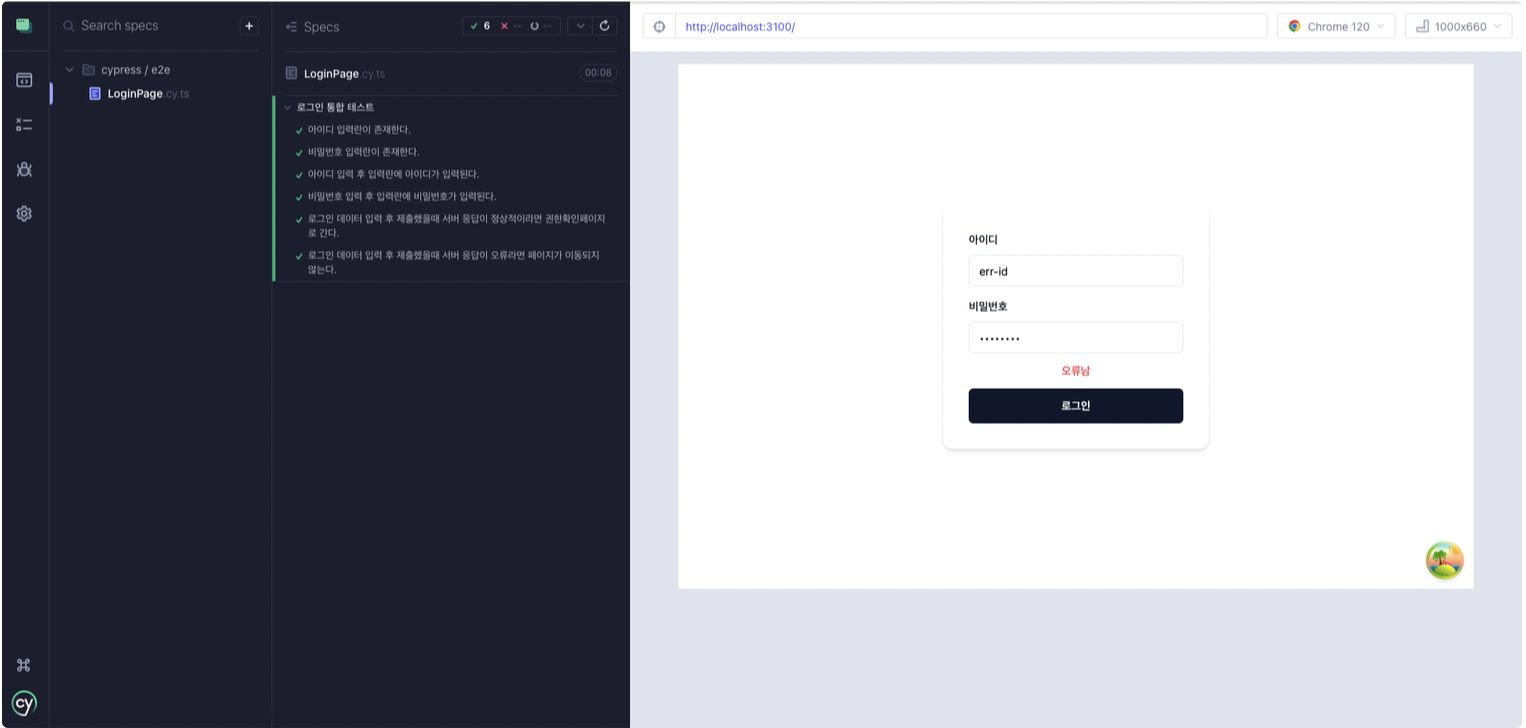
cypress open 으로 콘솔 열고 검사 실행시
cypress + github actions CI에 적용하기
name: Cypress Tests
on:
pull_request:
types: [opened, reopened, synchronize]
jobs:
cypress-run:
runs-on: ubuntu-latest
steps:
- name: Checkout
uses: actions/checkout@v3
- name: Install pnpm
uses: pnpm/action-setup@v2
with:
version: 8
- name: Get pnpm store directory
run: |
echo "STORE_PATH=$(pnpm store path --silent)" >> $GITHUB_ENV
- name: Setup pnpm cache
uses: actions/cache@v3
with:
path: ${{ env.STORE_PATH }}
key: ${{ runner.os }}-pnpm-store-${{ hashFiles('**/pnpm-lock.yaml') }}
restore-keys: |
${{ runner.os }}-pnpm-store-
- name: Install Node.js
uses: actions/setup-node@v4
with:
node-version: 18
cache: 'pnpm'
- name: Install dependencies
run: pnpm install
- name: E2E on Chrome
uses: cypress-io/github-action@v6
with:
browser: chrome
start: pnpm run serve
command: pnpm run cy --env VERSION=stage --record --group Cypress-Parallel --parallel
wait-on: 'http://localhost:3100'
# wait for 2 minutes for the server to respond
wait-on-timeout: 120
env:
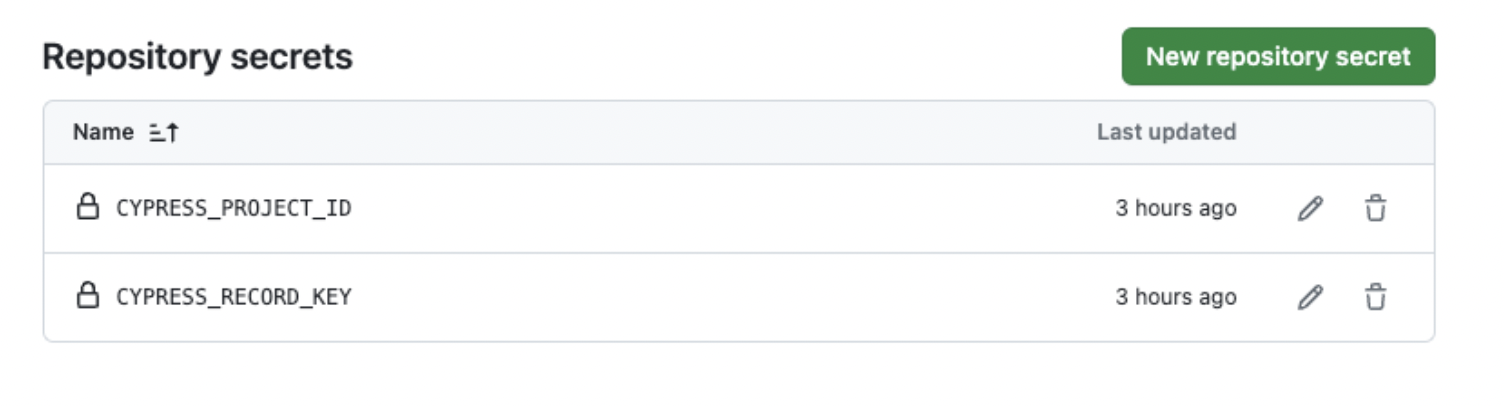
# pass the Cypress Cloud record key as an environment variable
CYPRESS_RECORD_KEY: ${{ secrets.CYPRESS_RECORD_KEY }}
# pass the project ID from the secrets through environment variable
CYPRESS_PROJECT_ID: ${{ secrets.CYPRESS_PROJECT_ID }}
주요 부분만 설명하면 아래와 같다.
- pull request 요청시 트리거되고 생성, 재생성, 커밋 변경사항이 있을 경우 yaml이 실행된다
- git action setup node 플러그인에 없는 pnpm을 설치해준다
- pnpm 설치 후 실행속도를 위해 pnpm의 가상 스토어(모듈 저장소)를 cache해준다
- 실제 cache와 현재 pnpm에서 읽은 lock파일의 값이 다르면 pnpm install로 모듈을 재설치 해준다
- cypress 플러그인을 사용해 각 옵션을 넣어주고 실행시킨다.
- record 옵션을 사용하면 cypress cloud라는 부분 유료 콘솔서비스에서 검사 내용이 녹화되고 저장된다
Cypress.io
cloud.cypress.io
위 사이트에서 정확히 확인이 가능하다
실제 동작을 살펴보면
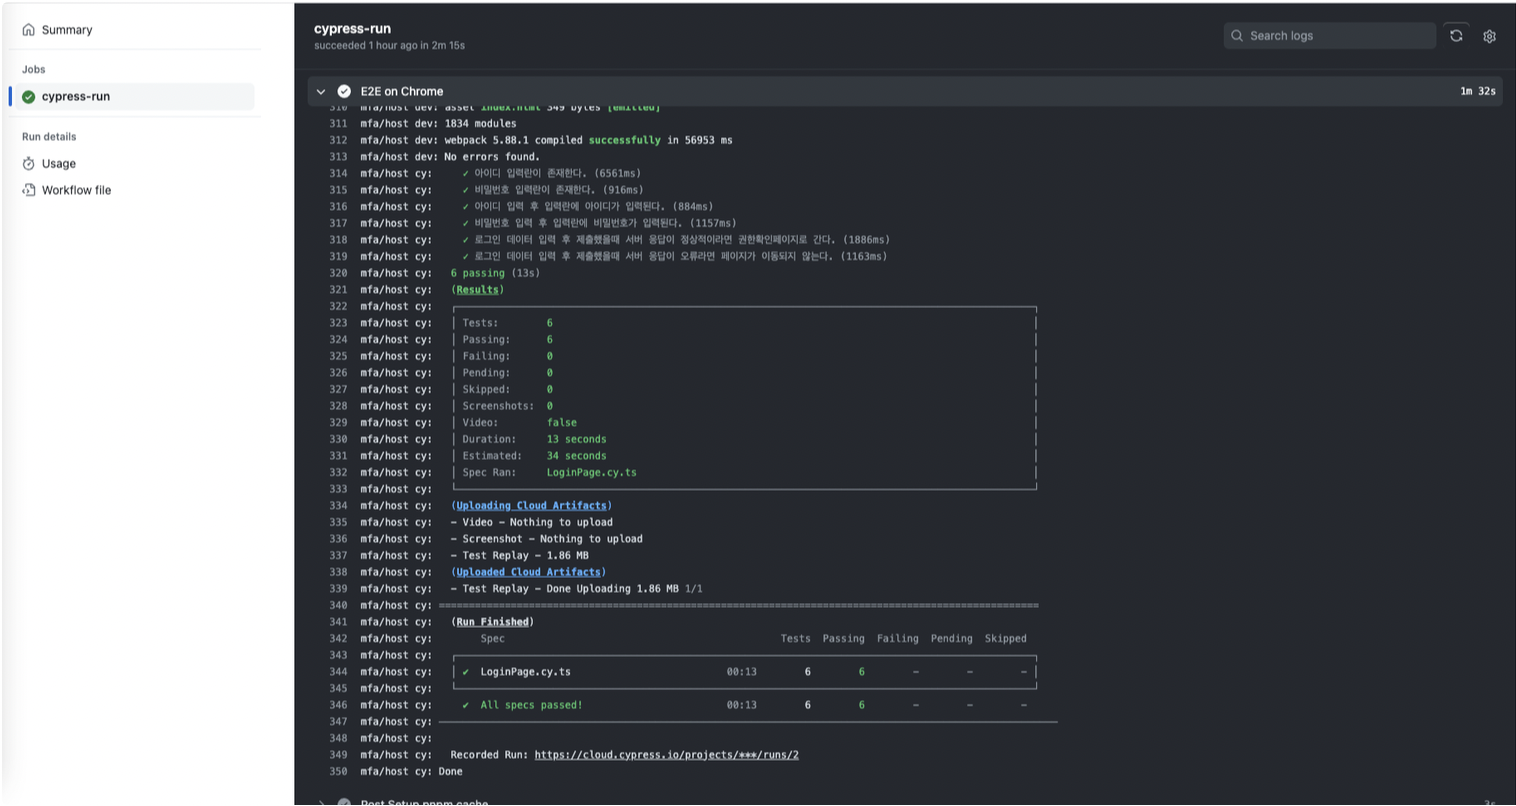
깃 액션에서 잘 수행되는 보습을 볼 수 있고
cypress cloud에 결과가 업로드 되는 모습을 볼 수 있다.
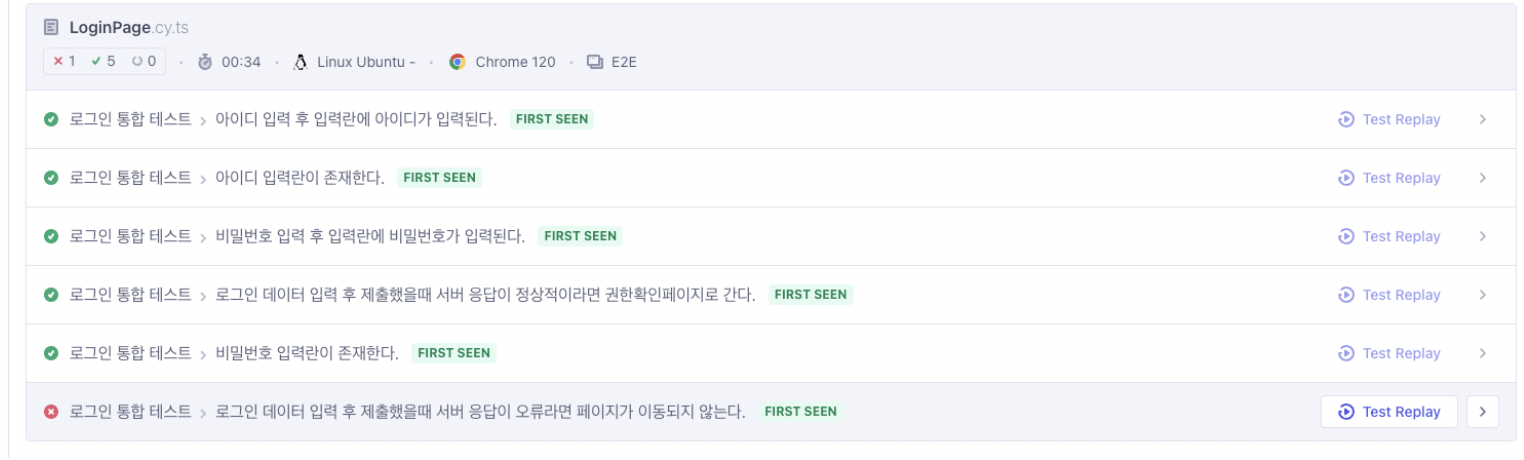
처음 돌렸을때
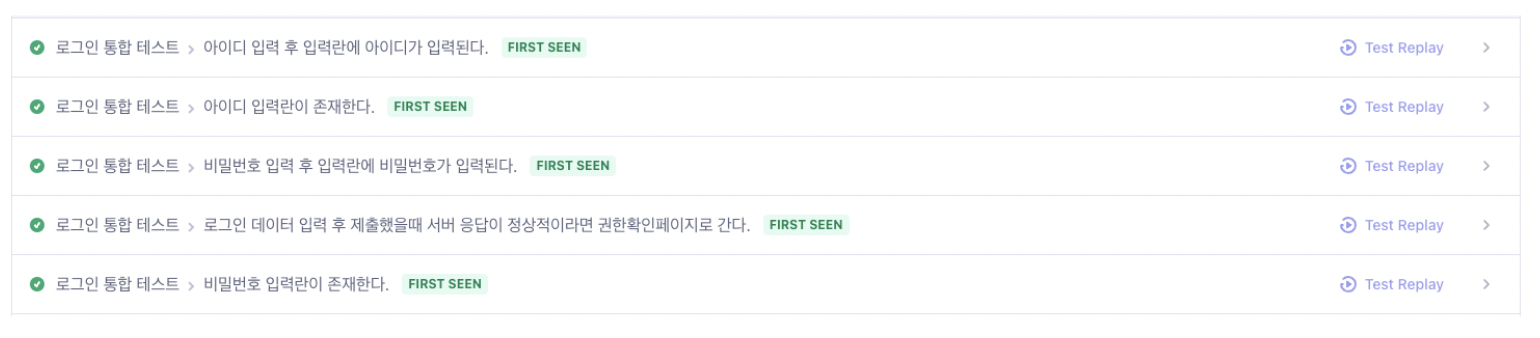
FIRST SEEN이라는 라벨과 함께 리플레이를 할 수 있게 버튼이 나온다
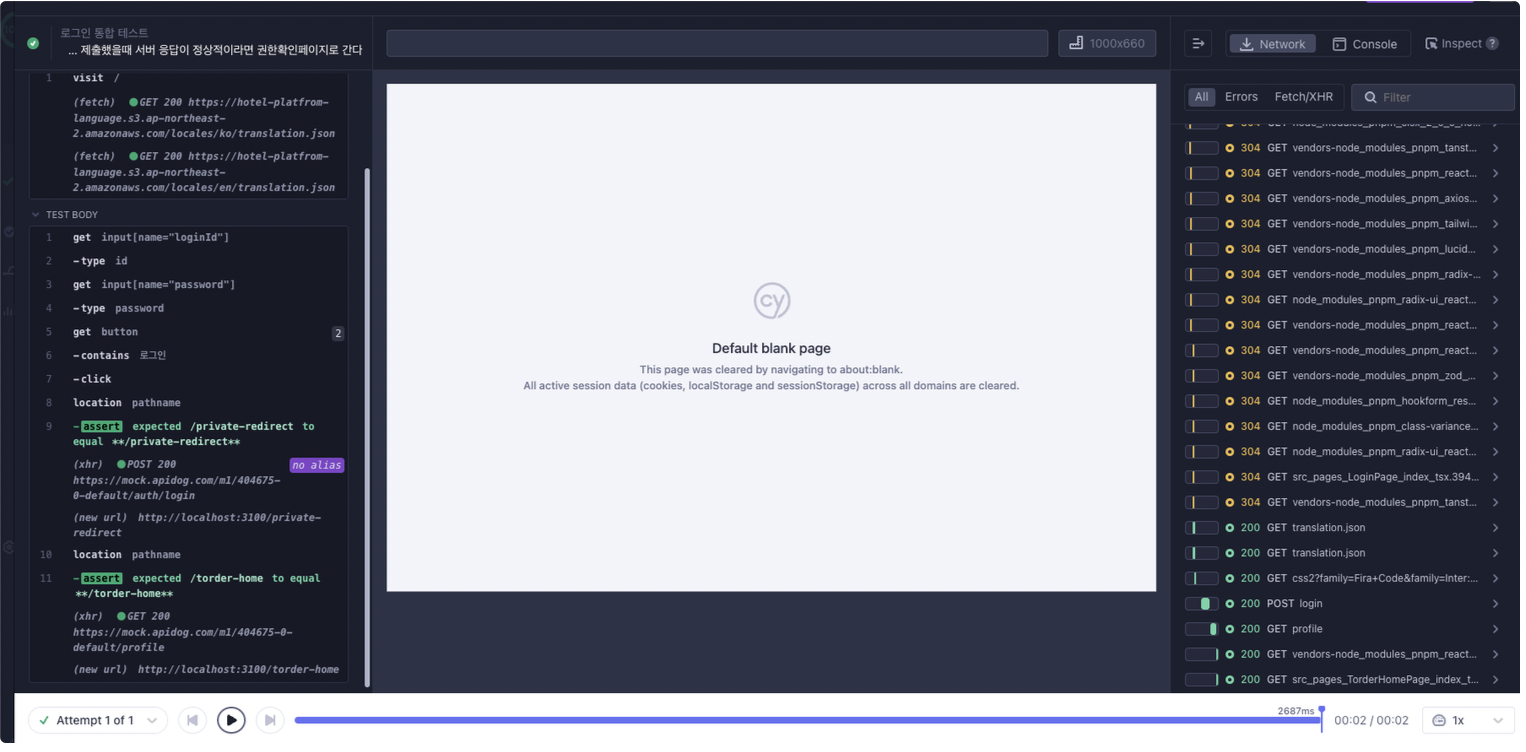
리플레이를 누르면 위와 같이 해당 테스트 부분을 재생할 수 있다
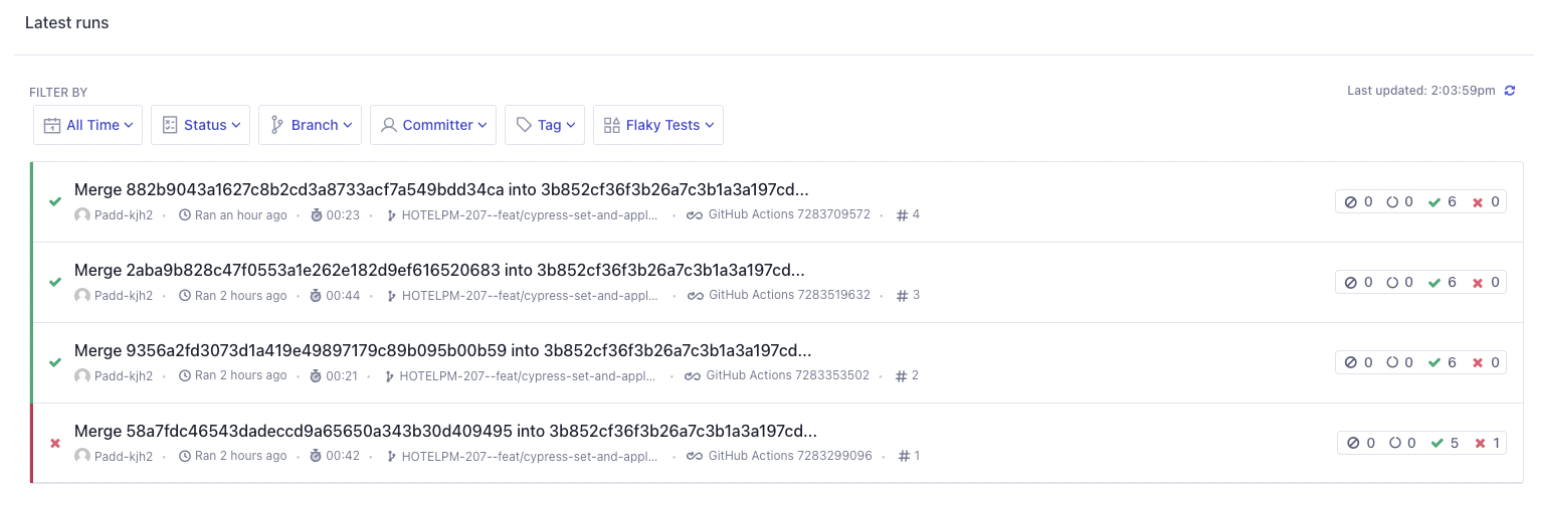
실패시
재시도시
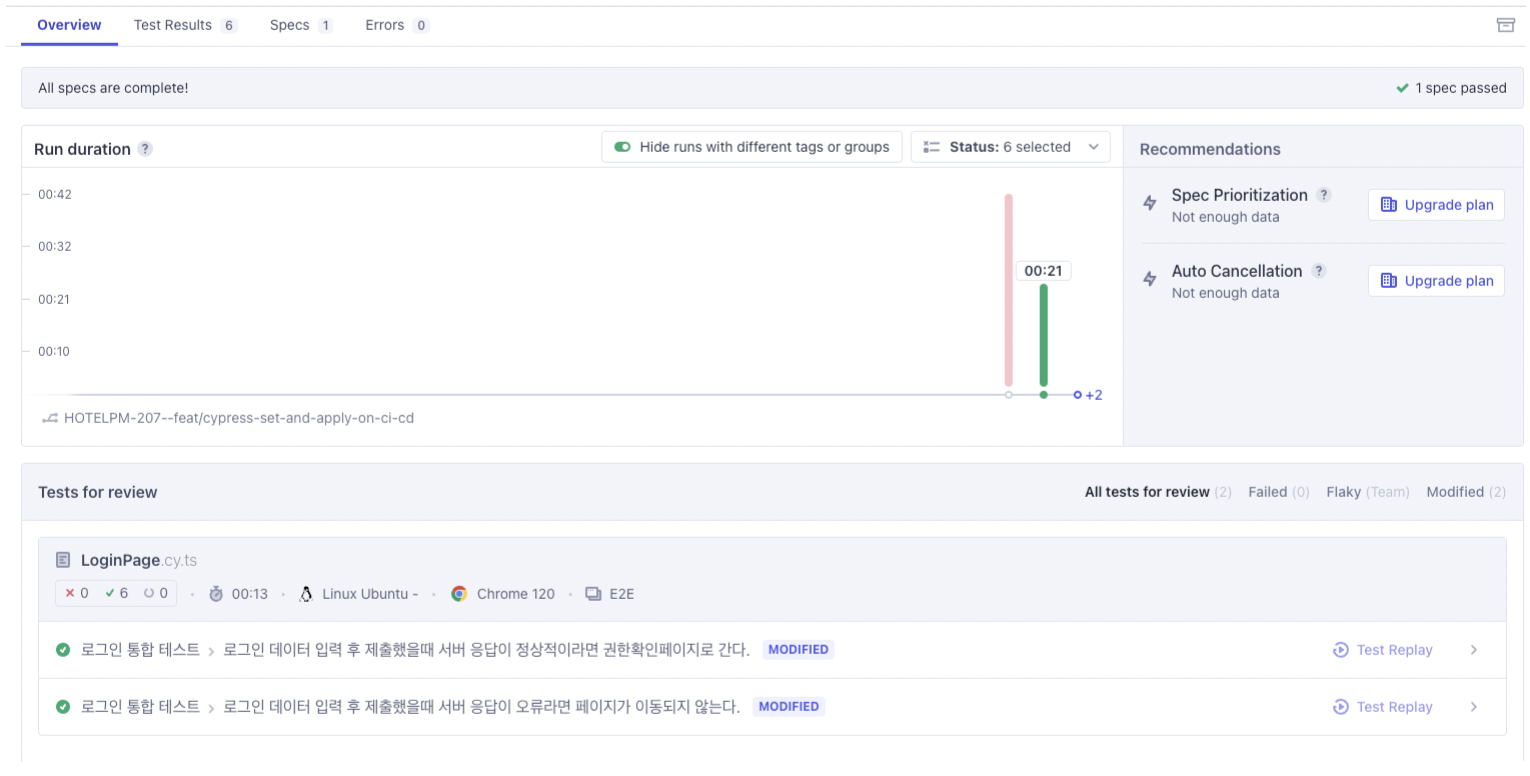
수정된 파일만 리뷰가 나와 리플레이를 볼 수 있는걸 확인할 수 있다
테스트 파일 미수정 후 재시도
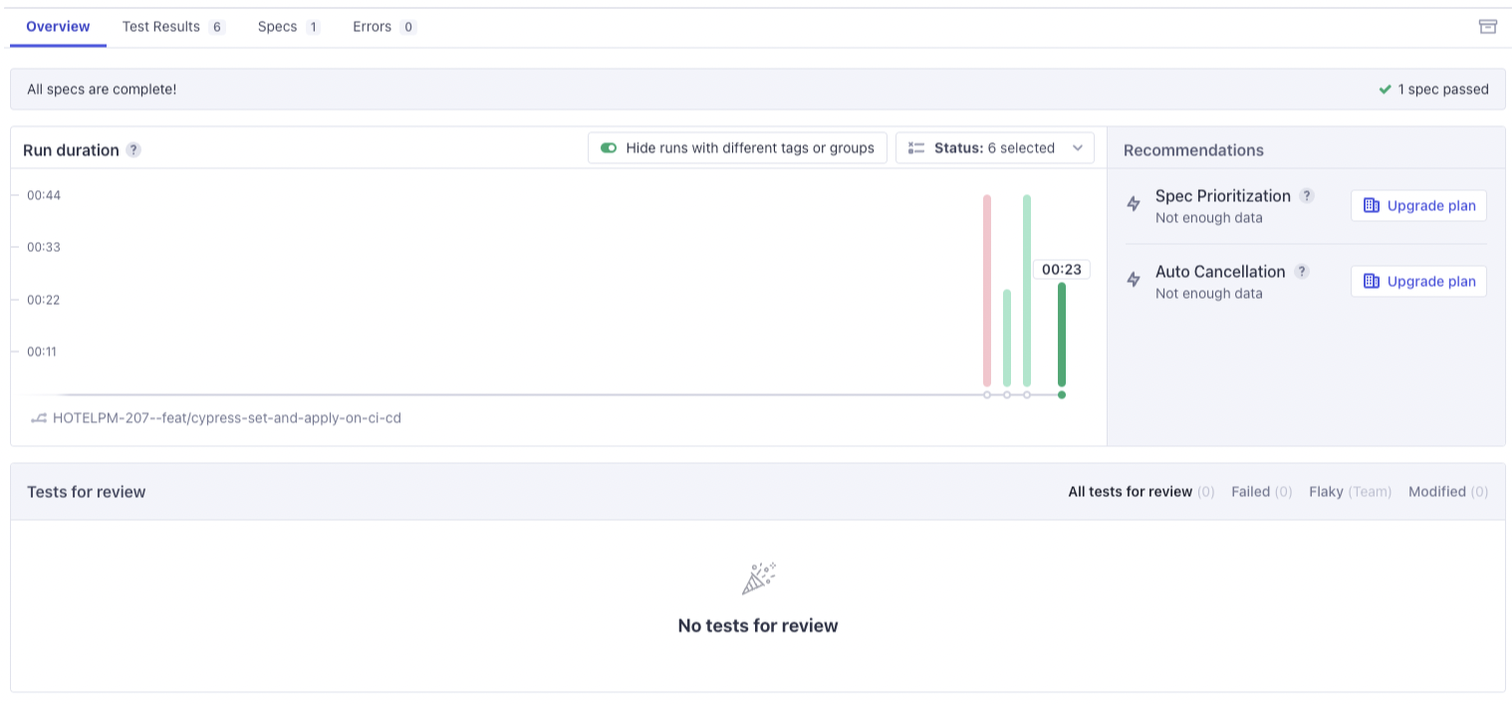
테스트 파일 수정된 내역이 없으면 리플레이 및 리뷰를 제공하지 않는다
Cloud 외에 저장하기
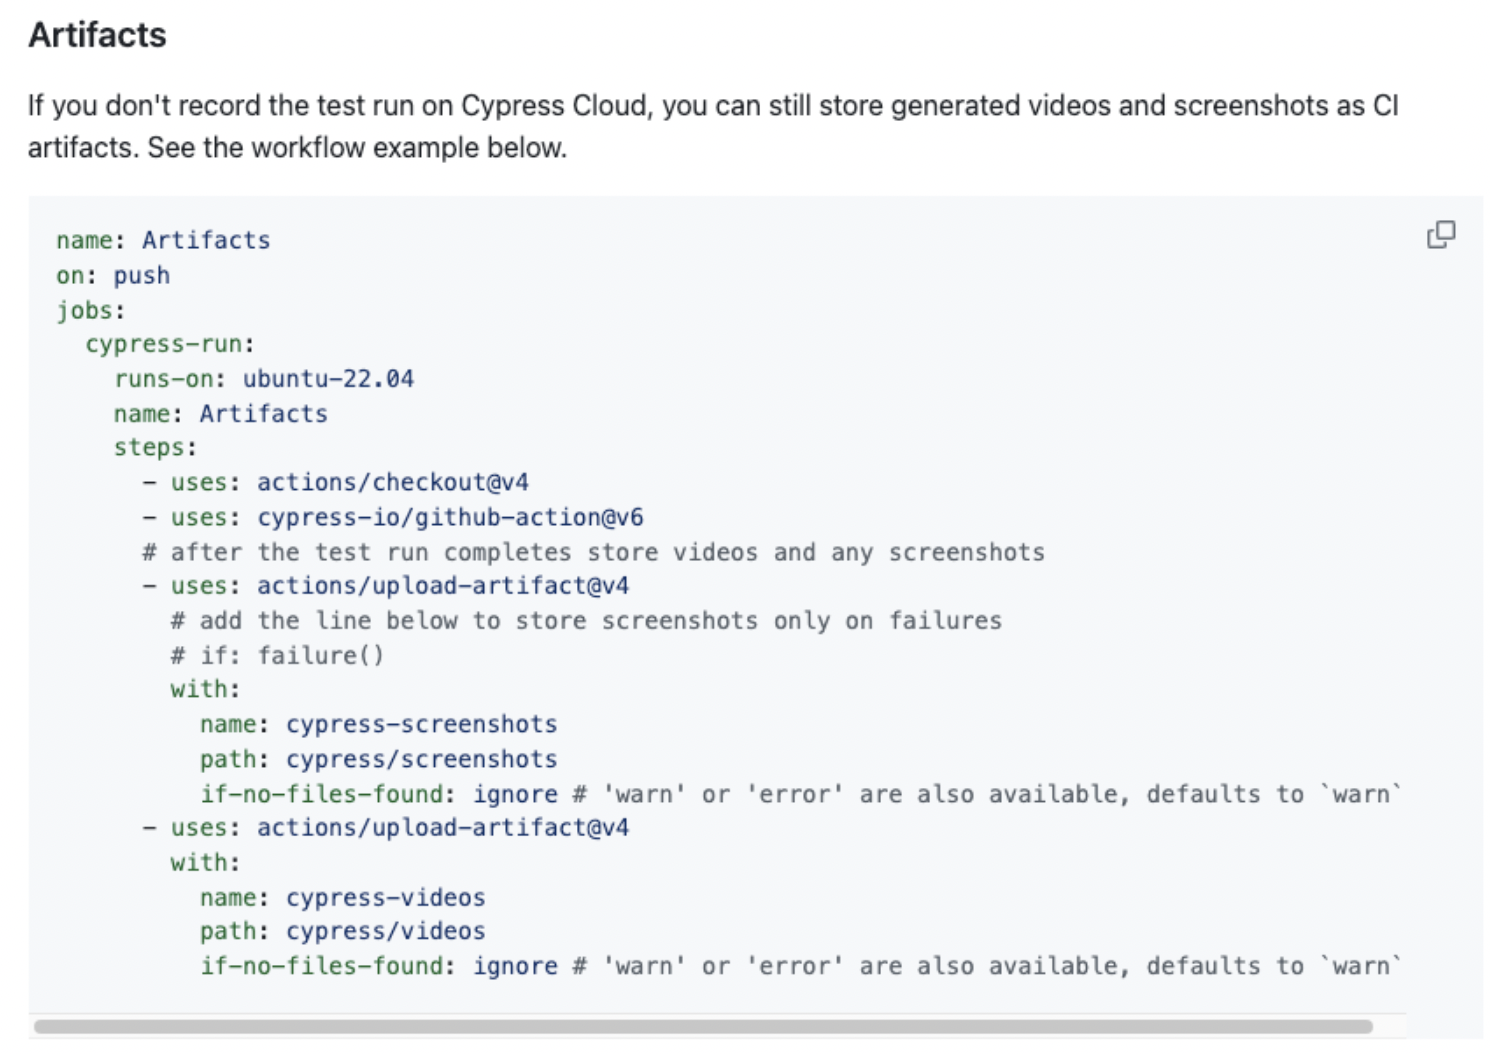
물론 Cypress Cloud를 사용하지 않고 해당 녹화, 이미지 파일을 저장할 수 있는 방법이 있지만 좋은 콘솔을 두고 사용하기는 굳이라는 생각이 든다
Parallel 적용해 Cypress 테스트 시간 줄이기
name: Cypress Tests
on:
  pull_request:
    types: [opened, reopened, synchronize]
jobs:
  cypress-run:
    runs-on: ubuntu-latest
    # Runs tests in parallel with matrix strategy https://docs.cypress.io/guides/guides/parallelization
    # https://docs.github.com/en/actions/using-jobs/using-a-matrix-for-your-jobs
    # Also see warning here https://github.com/cypress-io/github-action#parallel
    strategy:
      fail-fast: false # https://github.com/cypress-io/github-action/issues/48
      matrix:
        containers: [1, 2, 3] # Uses parallel instances

        .
        .
        .

      - name: E2E on Chrome
        uses: cypress-io/github-action@v6
        with:
          browser: chrome
          start: pnpm run serve
          command: pnpm run cy --record --group Cypress-Parallel --parallel
          wait-on: 'http://localhost:3100'
          # wait for 2 minutes for the server to respond
          wait-on-timeout: 120
위처럼 Parallel 옵션을 커맨드 라인에 옵션으로 넣어서 Cypress Cloud에서 각 가상머신에서 테스트가 나눠져 실행되게 설정해준다.
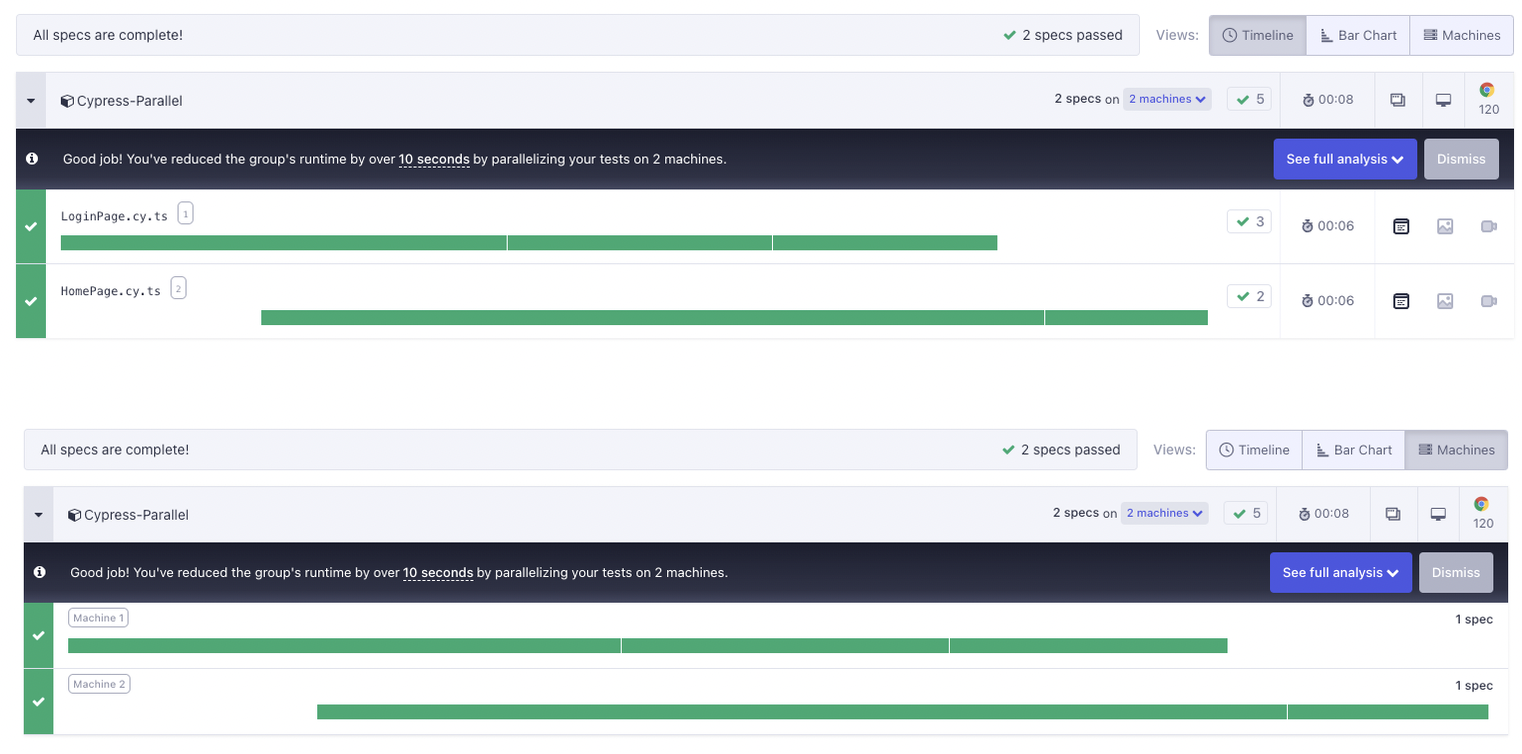
이미지처럼 테스트가 별도의 머신에서 돌고 있는 것을 볼 수 있다
이처럼 검사 시간을 줄여 CI 테스트에 대한 부담을 경감시키는 것도 생각해볼 수 있다
비고
https://docs.cypress.io/guides/getting-started/installing-cypress
Installing Cypress | Cypress Documentation
What you'll learn
docs.cypress.io
https://docs.cypress.io/guides/continuous-integration/github-actions
GitHub Actions | Cypress Documentation
What you'll learn
docs.cypress.io
https://github.com/cypress-io/github-action#action-version
GitHub - cypress-io/github-action: GitHub Action for running Cypress end-to-end & component tests
GitHub Action for running Cypress end-to-end & component tests - GitHub - cypress-io/github-action: GitHub Action for running Cypress end-to-end & component tests
github.com
https://docs.cypress.io/guides/cloud/smart-orchestration/parallelization
Parallelization | Cypress Documentation
What you'll learn
docs.cypress.io
'개발' 카테고리의 다른 글
| Flutter로 개발하고 Xcode에서 앱 띄울때 스플래쉬에 로고가 안나오는 이슈 원인과 해결 (1) | 2024.01.20 |
|---|---|
| Module federation에서 겪은 tailwind css 이슈 그리고 해결방법 (2) | 2024.01.15 |
| 아카이빙 : 프론트엔드 아티클 모으기 (0) | 2023.12.27 |
| 프론트 배포 자동화 git action편 (0) | 2023.11.01 |
| jest 세팅 및 zustand 전역 스토어 테스트 구축 (0) | 2023.11.01 |
- Total
- Today
- Yesterday
- DevOps
- 당신은 결국 무엇이든 해내는 사람
- pnpm
- TanStackQuery
- 독서
- 프론트엔드최적화
- CI
- design system
- subrouting
- 서버상태관리
- yarn-berry
- frontend
- zero install
- 상태관리전략
- Style
- defineProps
- 독후감
- Flutter
- error handle
- Micro Frontend Architecture
- 프론트엔드아키텍처
- aws
- test
- vue
- deploy
- Module Federation
- vue3
- Infra
- MFA
- node module
| 일 | 월 | 화 | 수 | 목 | 금 | 토 |
|---|---|---|---|---|---|---|
| 1 | 2 | 3 | ||||
| 4 | 5 | 6 | 7 | 8 | 9 | 10 |
| 11 | 12 | 13 | 14 | 15 | 16 | 17 |
| 18 | 19 | 20 | 21 | 22 | 23 | 24 |
| 25 | 26 | 27 | 28 | 29 | 30 | 31 |